The Hippie Hobby Box: DIY Floating Candles Review and Giveaway
 I am not going to lie, I love DIY’s and this months The Hippie Hobby Box is a great one.
I have always enjoyed making candles and since I have been spending so much time outside this year learning to make some simple citronella candles is a welcome craft. One of my favorite things is to fuse something I want with my love of DIY.
Each month the spirit of DIY and up-cycling are fused into one monthly do-it-youself project with the The Hippie Hobby Box.
The products featured in this post were provided to me free of charge courtesy of Hippie Hobby Box. This post may have affiliate links but this in no way will influence the review to follow and all opinions are my own.
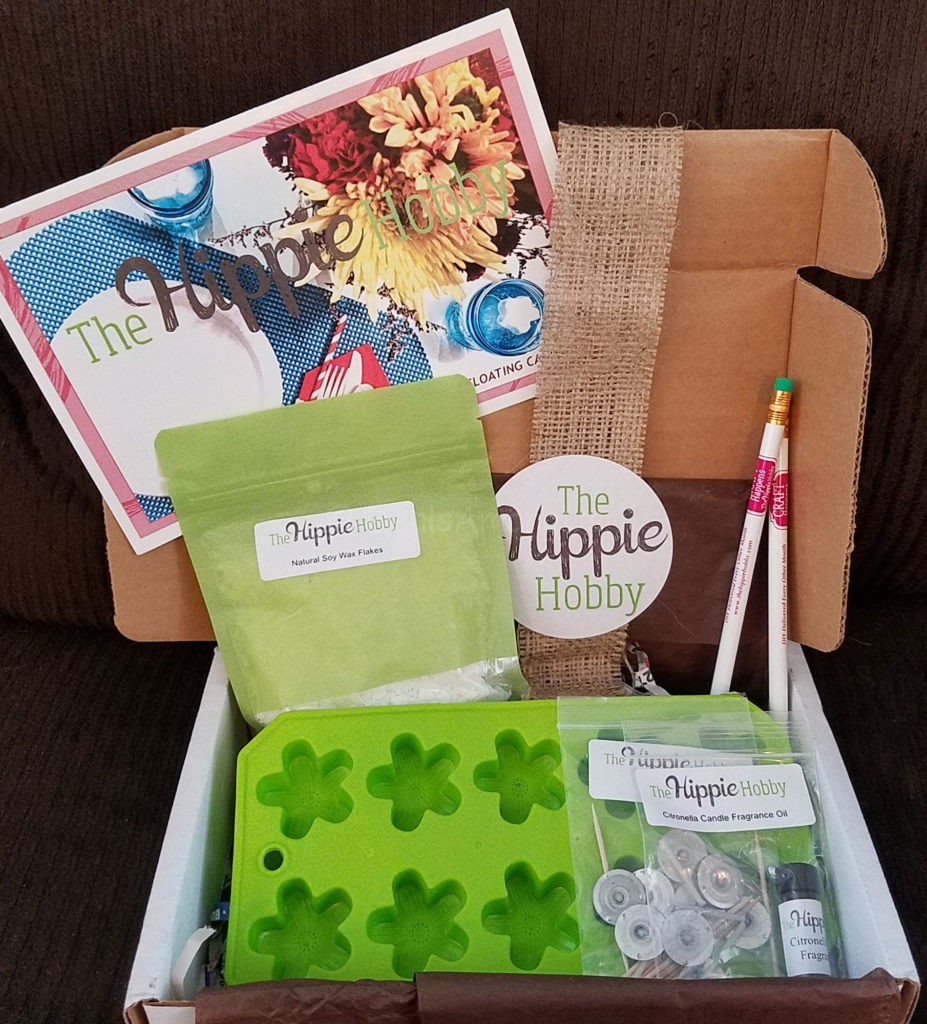
What is The Hippie Hobby Box exactly? The Hippie Hobby box is a every other month Do It Yourself kit with a hippie twist. Each box features up-cycled, recycled or natural product that includes almost everything needed to complete the project (standard items like a mason jar, hot pad, cooking spray, stir sticks and container to hold candles are not included).
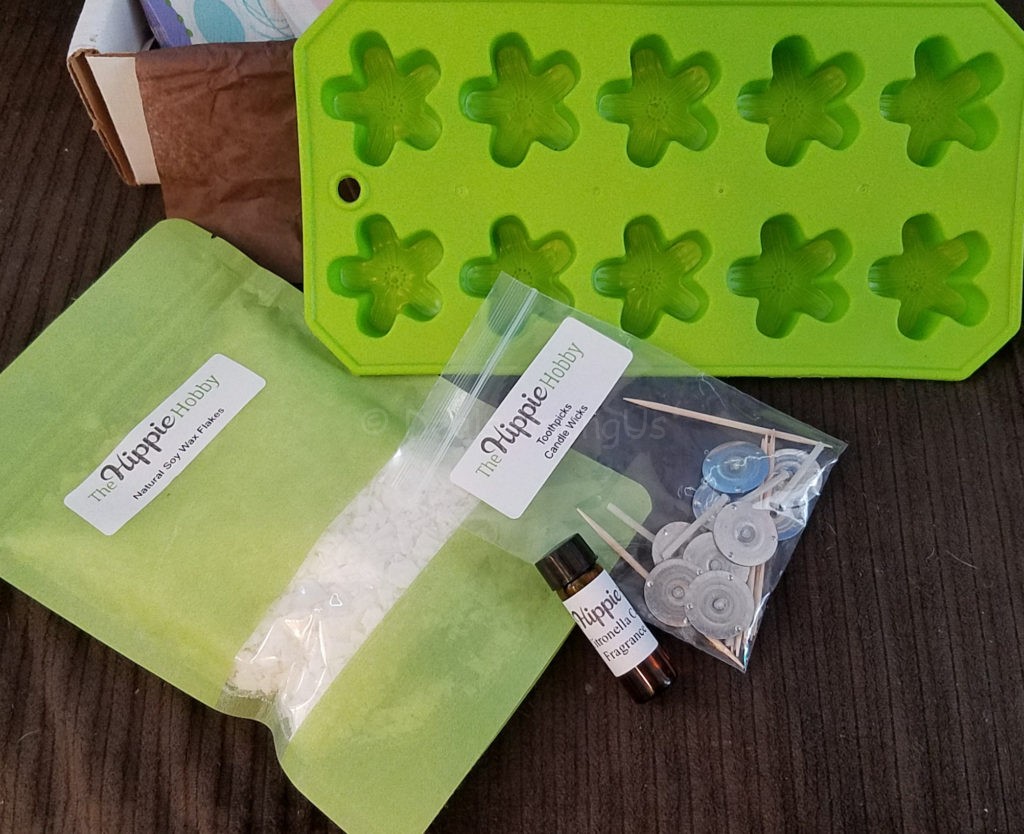 Included in the DIY Floating Candles were 96 g Soy Wax Candle Flakes, Decorative Flower Mold, Citronella Candle Fragrance Oil, (10) Candle Wicks and (10) Toothpicks.
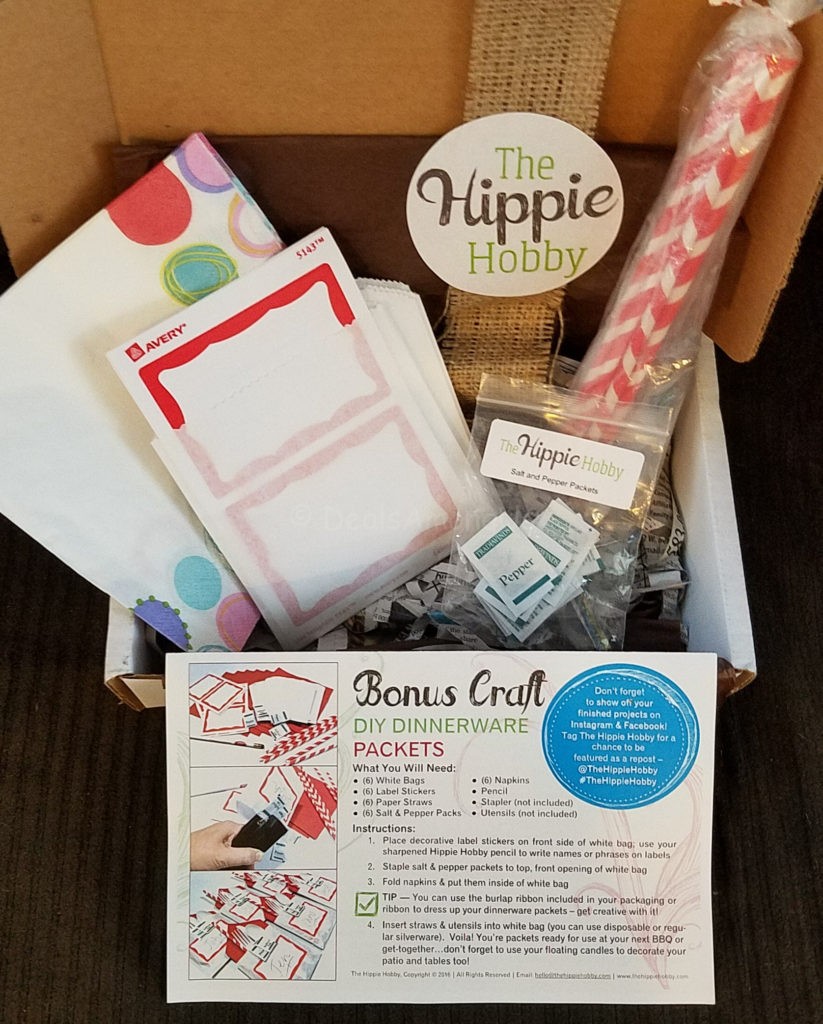 Also included to complete the Bonus Craft of DIY Dinnerware were the items needed for any dinner party including (6) 6 White Bags, (6) Label Stickers, (6) Paper Straws, (6) Salt & Pepper Packs and (6) Napkins.
The basic idea of this kit is to create floating candles that will ward off mosquitoes. The wax element of the ingredient’s were pre-measured in a packet – this made the melting of wax and measuring easy.
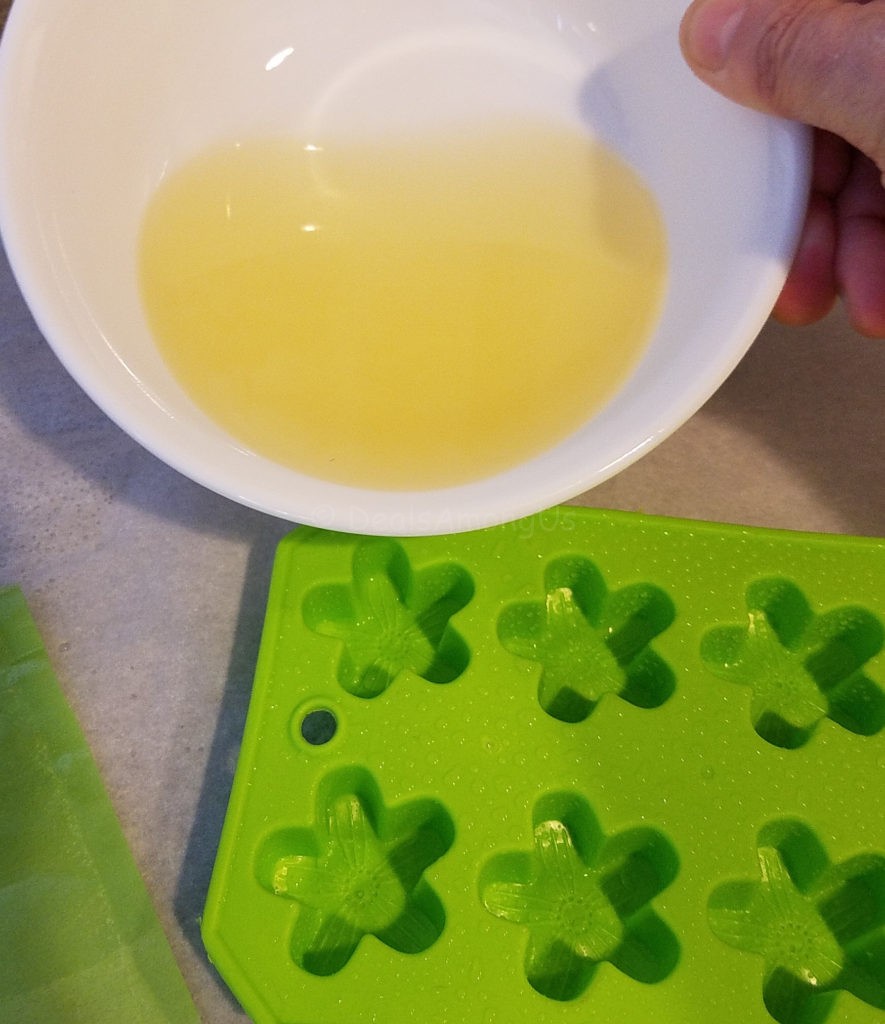 Once the wax was melted, the oil is added. It is recommended to spray the mold with non-stick spray. I did this and it made the removal of the complete candle much easier. The pouring was a challenge but had I used something with a pour spout it would have been easier.
 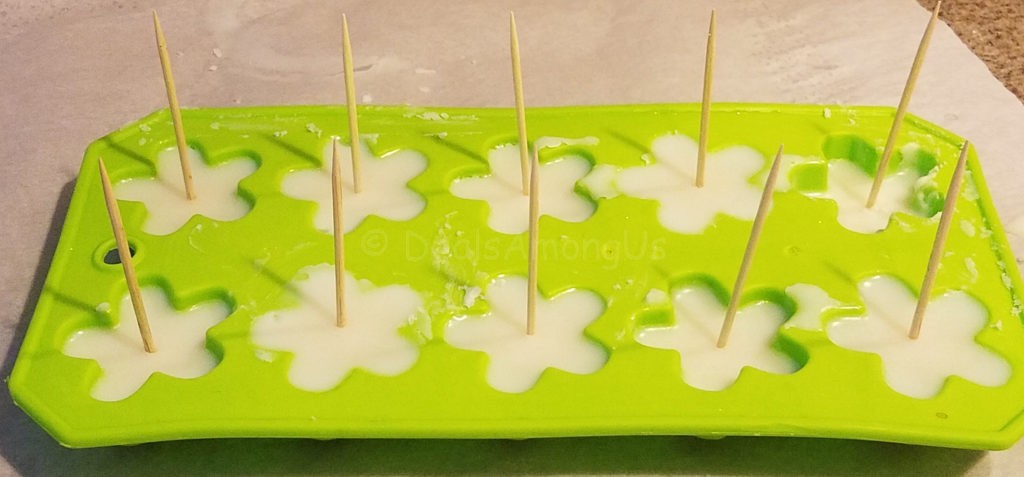 When the candles had hardened a bit I had to place the toothpick to make the hole for the wick. This was an easy step that made all the difference when I removed them and placed the wicks.
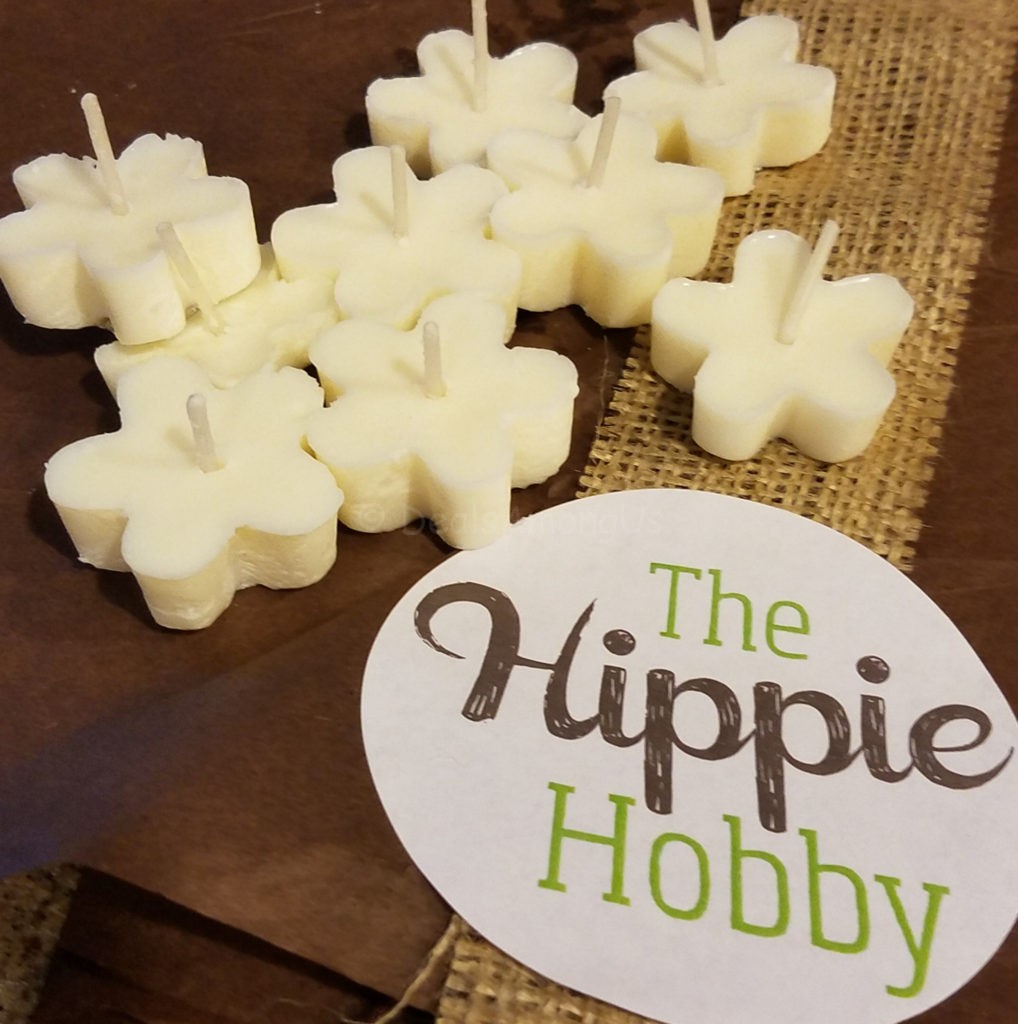
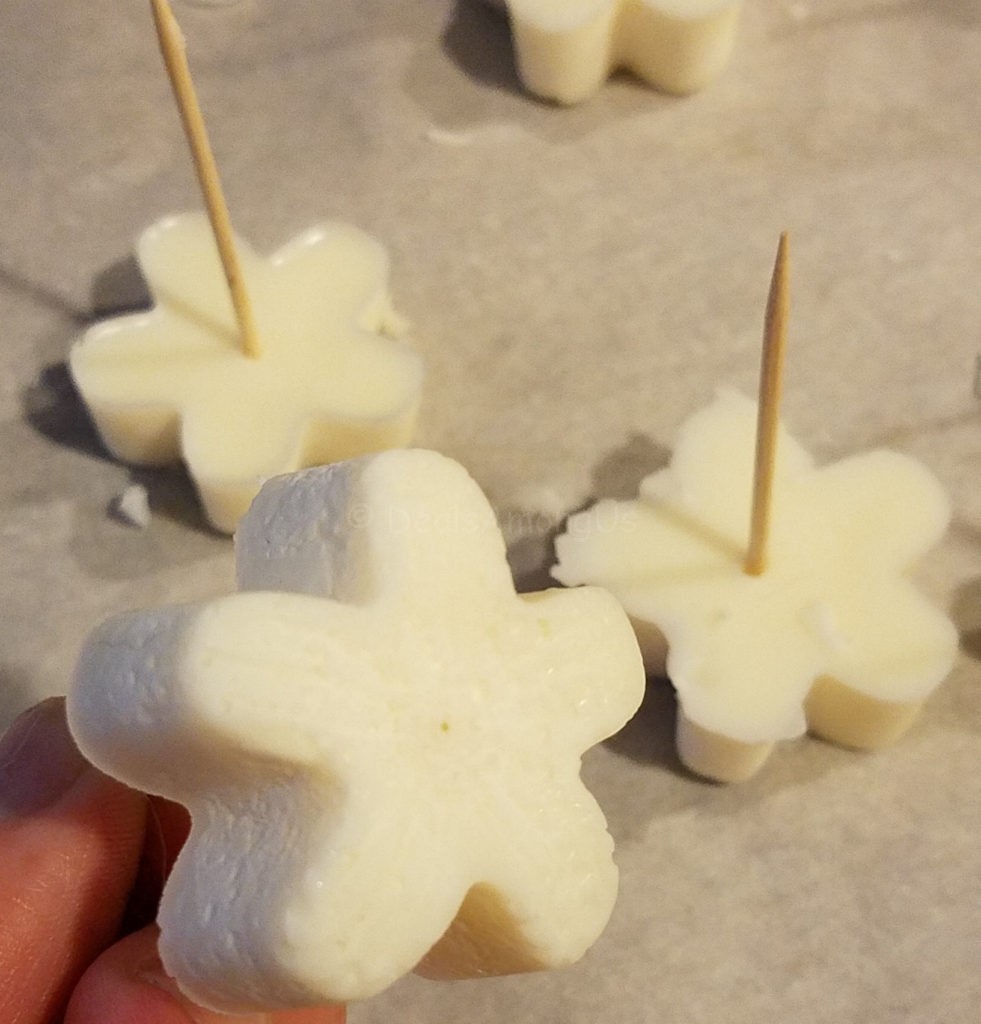 Once the candles were hardened I removed them and placed the wick. The result was a super cute set of candles that I made.
 This was another simple, and unique project. If you are looking for fun DIY project, delivered to your door I would HIGHLY recommend you ordering a Hippie Hobby Box.
Use code “DEALS7” for $7.00 off your first box!
The Hippie Hobby Box is a bi-monthly box that ships May, July, September, November, January and March and is $23.95/every other, 3 kits/$65.84 and 6 kits/$119.70 with free shipping to the United States and $5.99 for shipping to Canada
Currently shipping to the United States and Canada
See video for the Mini DIY Necklace Diffuser Kit
Click here for more information about The Hippie Hobby Box
You can also find The Hippie Hobby Box on Facebook, Twitter, Pinterest and Instagram
 GIVEAWAY: The Hippie Hobby Box is offering a Hippie Project to my readers! (2) Two winner’s will each win a DIY Diffuser Necklace Kit Mini Kit. I will be randomly choosing 2 people on September 3rd (9/3/2016) to receive this DIY Necklace Kit! To enter complete the entries below! Open to residents in the US only. Winner’s will be notified by DealsAmongUs by email and prize will be fulfilled by The Hippie Hobby Box! Remember you have 48 hours to claim prize, or I will choose another winner. GOOD LUCK!!!
I shop the after holiday sales and clearances for art supplies.
I have a table with all my craft supplies and current projects. That way I don’t have to put away or clean up when I’m in the middle of projects.
My favorite craft tip is to keep all your supplies stored in one place.
Don’t be afraid to try something new
Buy plastic table cloths at the dollar store to use to protect tables from craft projects. They are cheap, reusable, and protect better than paper.
I haven’t made my own candles in years. Looks like a nice kit.
Cleanup after crafting otherwise it gets out of hand
Do a craft when you have some problems on your mind, it helps you.
My fav tip is to hold on to items that you can use for craft projects. Ie popsicle sticks, milk cartons, etc
Mixing silver glitter into modge podge for glitter effect that’s not messy 🙂
Keep yourself organized with a container of some kind for every type of craft. It makes it so much easier to find what you want when you want it. Also label that container with a cute write-on sticker. Nothing beats great organization!
A good craft tip would be to use some plastic tarp to keep under your paintings or craft projects to protect the floor when working.
Keep everything separated in different containers so you know where everything is.
I am a beginner crafter so the only thing I can think of is to keep your craft items organized so it’s easy and quick to find and have lots of fun. Do worry about perfection.
Pingback: Win a Hippie Hobby Box Diffuser Mini Kit | Just Sweep
I think I might like this box!
I would say having multi-colored glitter. Makes projects pretty!
I would say q-tips. They help for all the little things.
I always try to keep everything organized. Which is not always easy!
not really a craft tip, but i look for supplies at yardsales!
Read the instructions, read the instructions and read the instructions.
Thanks for the contest.